Battle of Spion Kop
| Battle of Spion Kop | |||||||
|---|---|---|---|---|---|---|---|
| Part of Second Boer War | |||||||
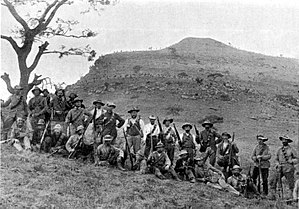
 l lBoers at Spion Kop, 1900. |
|||||||
|
|||||||
| Belligerents | |||||||
|
|
|
||||||
| Commanders and leaders | |||||||
|
|
|
||||||
| Strength | |||||||
| 20,000 men 36 field guns |
8,000 men 4 field guns and 2 Maxim-Nordenfelt |
||||||
| Casualties and losses | |||||||
| 243 killed 1,250 wounded |
68 killed 267 wounded |
||||||
|
|
|||||||
The Battle of Spion Kop (Dutch: Slag bij Spionkop; Afrikaans: Slag van Spioenkop) was fought about 38 km (24 mi) west-south-west of Ladysmith on the hilltop of Spioenkop(1) along the Tugela River, Natal in South Africa from 23–24 January 1900. It was fought between the South African Republic and the Orange Free State on the one hand and British forces during the Second Boer War campaign to relieve Ladysmith. It was a Boer victory.
General Sir Redvers Buller, VC, commander of the British forces in Natal, was attempting to relieve a British force besieged in Ladysmith. The Boers under General Louis Botha held the Tugela River against him. Although Botha's men were outnumbered, they were mostly equipped with modern Mauser rifles and up-to-date field guns, and had carefully entrenched their positions. In late December, 1899, Buller made a frontal assault on the Boer positions at the Battle of Colenso. The result was a heavy British defeat.
Over the next few weeks, Buller received further reinforcements, and also acquired sufficient carts and transport to operate away from the railway line which was his main supply line. Buller devised a new plan of attack to relieve Ladysmith. His army was to launch a two-pronged offensive designed to cross the Tugela River at two points and create a bridgehead. They would then attack the defensive line that blocked Buller's advance to Ladysmith. The area was only 32 kilometres (20 mi) from Ladysmith. Buller delegated control of his main force to General Sir Charles Warren, to cross at Trichardt's Drift. Buller would then send a second smaller force, under Major General Neville Lyttelton to attack east of Warren's force as a diversion at Potgieter's Drift. Once across the Tugela the British would attack the Boer defensive positions and then cross the open plains to relieve Ladysmith.
...
Wikipedia

